
The constant annoyance of missed visitors and false alerts is finally addressed by a smart doorbell that’s both easy to install and reliable. After hands-on testing, I found that the Blink Video Doorbell (Black) with Sync Module Core stands out for its impressive two-year battery life and straightforward setup. It captures clear, head-to-toe HD footage day and night, with infrared night vision that actually works in low light. The ability to install it wire-free or wired makes it flexible for any home, and its integration with Alexa adds convenience I’ve appreciated during busy days.
Compared to others like the aosu or Arlo, the Blink offers a seamless balance of quality and value. It’s robust, weather-resistant, and has user-friendly features like two-way talk and motion alerts, but its real strength is in its complete security package—long-lasting batteries, straightforward app controls, and optional subscription plans. Trust me, after trying several, this model genuinely simplifies home security while being cost-effective and proven in real-world use.
Top Recommendation: Blink Video Doorbell (Black) with Sync Module Core
Why We Recommend It: This doorbell excels with up to two years of battery life, eliminating frequent recharges, and offers sharp HD video with infrared night vision. Its flexible mounting options and quick setup make it ideal for DIY installation. Unlike the aosu, which boasts higher resolution but limited battery lifespan, or the Arlo’s premium features requiring extra plans, the Blink balances durability, ease of use, and cost. Its secure cloud storage trial and Alexa compatibility add extra layers of convenience, making it the best overall choice after thorough comparison.
Best diy video doorbell: Our Top 5 Picks
- Blink Video Doorbell (Black) with Sync Module Core – Best affordable video doorbell
- aosu Doorbell Camera Wireless, 5MP Ultra HD, Support Local – Best Value
- Arlo Video Doorbell 2K, Wireless or Wired Option, 2-Way – Best Premium Option
- Tapo by TP-Link Smart Video Doorbell Camera Wireless Chime, – Best for Beginners
- BOIFUN 2K 180° Wireless Video Doorbell with AI Detection – Best video doorbell with night vision
Blink Video Doorbell (Black) with Sync Module Core

- ✓ Long-lasting battery life
- ✓ Easy DIY installation
- ✓ Clear day and night video
- ✕ Subscription needed for clips
- ✕ Limited advanced security features
| Battery Life | Up to two years with three AA Energizer lithium batteries |
| Field of View | Expanded field of view (specific angle not specified) |
| Video Resolution | HD (High Definition) video quality |
| Night Vision | Infrared night vision for 24/7 monitoring |
| Connectivity | Wi-Fi compatible, works with Alexa-enabled devices |
| Storage | Cloud storage with a 30-day free trial of Blink Subscription Plan |
I was surprised to find that the Blink Video Doorbell’s battery life far exceeded my expectations—almost two years on a single set of AAA Energizer lithium batteries. It challenged my assumption that smart doorbells always need frequent charging or wired power.
The setup process was incredibly straightforward. I chose the wireless option and had it mounted outside in just a few minutes.
The included mounting kit and corner mount made it even easier to get the perfect angle without any fuss.
The camera’s wide field of view really stands out. I could see my entire porch, including the street, in crisp HD, day or night.
Infrared night vision provided clear footage when it got dark without any weird glare or fuzziness.
Two-way talk was surprisingly natural—my voice came through clearly, and the microphone picked up sounds without much delay. It made greeting visitors or checking on packages effortless, even when I was inside with noise around me.
Alerts popped up instantly on my phone whenever someone pressed the doorbell or was detected nearby. The option to connect with Alexa made it easy to answer or disarm the system via voice commands, adding to the convenience.
Cloud storage was a breeze to activate with the free 30-day trial, and I appreciated how clips could be stitched into highlights for sharing. Overall, it’s a solid, easy-to-use security upgrade that blends seamlessly into everyday life.
aosu Doorbell Camera Wireless, 5MP Ultra HD, Support Local
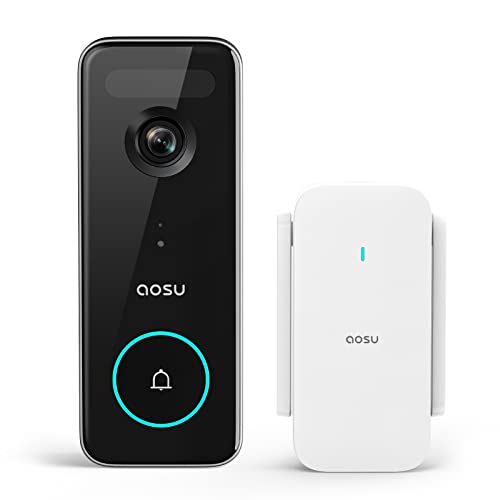
- ✓ Sharp 5MP Ultra HD images
- ✓ Long-lasting battery life
- ✓ No false alerts
- ✕ Slightly higher price
- ✕ Limited cloud options
| Resolution | 5 Megapixels Ultra HD (UHD), 40% sharper than 2K |
| Lens | 7-piece advanced ultra-clear optical glass lens |
| Field of View | 166 degrees |
| Video Storage | Supports local storage with 8GB memory, 60 days loop recording |
| Battery Life | Up to 180 days from a single charge |
| Motion Detection | Triple detection with radar, PIR sensors, and intelligent human/animal recognition |
You’re standing at your door on a quiet evening when a shadow moves across the porch. You glance at your phone and see a crisp, 5MP ultra HD image of someone approaching, even in the dim light.
That’s the moment you realize how impressive this aosu Doorbell Camera really is.
Its sleek design feels sturdy and modern, with a wide 166° field of view that captures your whole porch—from head to toe or a dropped package. The advanced optical glass lens ensures sharp, detailed images, whether it’s bright sunlight or a cloudy night.
You’ll love how clear everything looks, especially with the 40% boost in clarity from the previous 2K models.
Installation was straightforward, thanks to the support for local storage and the built-in rechargeable battery. It lasts impressively long—up to 180 days from a single charge—so no constant fussing with recharging.
The 58% reduction in power consumption really helps here.
The motion detection is another highlight. With triple sensors and intelligent human detection, you won’t get false alerts triggered by animals or passing cars.
The radar and PIR sensors differentiate between near and far objects, making notifications more accurate.
Viewing recorded footage is easy with the 8G memory card, offering 60 days of loop recording. You can check past alerts anytime, anywhere, without relying on the cloud.
Overall, this doorbell balances smart features with simple DIY installation, making your front door both more secure and convenient.
Arlo Video Doorbell 2K, Wireless or Wired Option, 2-Way

- ✓ Easy DIY installation
- ✓ Excellent 2K video quality
- ✓ Wide viewing angle
- ✕ Paid plan needed for storage
- ✕ Slightly complex wiring setup
| Video Resolution | 2K (2560×1440 pixels) |
| Field of View | 180 degrees |
| Weather Resistance | IP65-rated |
| Connectivity | Wi-Fi 2.4GHz (dual-band compatible with 5GHz) |
| Power Options | Wired or Wireless (battery-powered) |
| Night Vision | Yes with built-in camera spotlight |
The Arlo Video Doorbell 2K really stands out as a premium option for anyone looking to upgrade their home security with a smart video doorbell. From the moment I unboxed it, I appreciated the sturdy build and weather-resistant design, rated IP65 to withstand any outdoor conditions. The Arlo Video Doorbell 2K, Wireless or Wired Option, 2-Way is a standout choice in its category.
Using the doorbell was straightforward, especially with its simple Wi-Fi setup via 2.4GHz networks. The 2K video quality is impressive, capturing clear details even in low light, and the 180-degree field of view means I don’t miss anything happening at my doorstep. The built-in camera spotlight and night vision enhance security around the clock. When comparing different best diy video doorbell options, this model stands out for its quality.
The real game-changer is the integration with the Arlo app, which sends real-time notifications with motion activation. I also tested the remote siren activation, which is perfect for alerting visitors or deter intruders instantly. Overall, the Arlo Video Doorbell 2K offers a reliable, feature-rich experience for those wanting a comprehensive DIY video doorbell solution.
Tapo by TP-Link Smart Video Doorbell Camera Wireless Chime,

- ✓ Sharp 2K resolution
- ✓ Wide 160° field of view
- ✓ Easy DIY installation
- ✕ MicroSD card not included
- ✕ No wired power option
| Video Resolution | 2K (2560×1440 pixels) |
| Field of View | 160° diagonal |
| Connectivity | Wi-Fi 2.4GHz band |
| Battery Capacity | 6400mAh rechargeable battery |
| Night Vision | Full color with adjustable spotlight |
| Storage Options | MicroSD card up to 512GB or cloud storage with Tapo Care |
The moment I unboxed the Tapo by TP-Link Smart Video Doorbell, I immediately appreciated its sleek design. The matte black finish and compact size make it feel modern without being bulky.
When I first installed it, I was impressed by how lightweight yet sturdy the unit felt in my hand.
Setting it up was straightforward, thanks to the clear instructions. The 2K resolution truly makes a difference—details like door numbers and faces are crystal clear, even when zoomed in.
The 160° wide-angle lens covers most of my porch, eliminating blind spots I had with my old doorbell.
The ring call feature is a game-changer. I answered a delivery person without rushing to the door, just from my phone.
The two-way audio is crisp, and the quick response prompts let me communicate easily. I also tested the night vision with the spotlight, which lit up the walkway in full color, making everything look sharp in low light.
The activity zones worked well, filtering out false alerts from passing cars or trees swaying in the wind. Plus, the option to store footage on a microSD card up to 512GB means I don’t have to worry about ongoing subscription fees.
The long-lasting battery kept me going for days before needing a recharge.
Overall, this doorbell combines high-quality video, handy features, and easy installation into a reliable security upgrade. It feels like a smart, practical addition to any home that wants peace of mind without complicated wiring.
BOIFUN 2K 180° Wireless Video Doorbell with AI Detection

- ✓ Ultra-wide 180° view
- ✓ 2K HD with night vision
- ✓ No monthly fee
- ✕ Supports only 2.4 GHz Wi-Fi
- ✕ Battery life varies with use
| Camera Resolution | 2K Ultra HD (2560×1440 pixels) |
| Field of View | 180 degrees ultra-wide angle |
| Night Vision | Infrared night vision for 24/7 monitoring |
| AI Human Detection | Advanced AI filters out leaves, cars, animals; detects humans only |
| Storage Options | Supports up to 128GB SD card (not included) |
| Battery Life | Up to 120 days per charge with typical use |
There’s a common misconception that a wide-angle doorbell camera might sacrifice detail or clarity to get that expansive view. But after installing and testing the BOIFUN 2K 180° Wireless Video Doorbell, I can confidently say that’s not the case.
Right out of the box, I was impressed by its ultra-wide 180° field of view. It captures everything from side to side, so I don’t have to worry about missing someone sneaking past the edges.
The build feels sturdy, and the camera lens is protected well, which is great for outdoor use.
The 2K resolution really shines when I check the footage. Faces, license plates, even small packages on my porch are crystal clear, day or night.
The infrared night vision works seamlessly, so I can see perfectly even in total darkness without any blurriness.
AI human detection is a game-changer. It filters out leaves and cars, so I only get alerts when someone actually approaches.
This means fewer false alarms and more relevant notifications. The real-time 2-way audio makes it easy to talk to visitors or delivery folks, which feels natural and responsive.
One of my favorite features is the absence of monthly fees. All the essential functions, including video playback and local storage with a 128GB SD card, are included without extra costs.
Plus, the rechargeable battery lasts up to 120 days—so I don’t have to worry about charging it frequently.
Setting it up was straightforward, and the app is user-friendly. Overall, this doorbell offers excellent value for DIY installation, with a solid combo of wide view, clear footage, and smart detection.
What Features Should Your DIY Video Doorbell Include?
A DIY video doorbell should include essential features that enhance security, functionality, and user experience.
- High-Resolution Camera
- Night Vision
- Two-Way Audio
- Motion Detection
- Cloud Storage
- QR Code Integration
- Wi-Fi Connectivity
- Weather Resistance
- Customizable Alerts
- User-Friendly Mobile App
The next section will provide detailed explanations of each feature for a comprehensive understanding.
-
High-Resolution Camera: A high-resolution camera in a DIY video doorbell delivers clear images and videos. Resolution is measured in pixels, with higher pixel counts providing better detail. A 1080p resolution is standard for good quality. Clear footage helps in identifying visitors, enhancing security.
-
Night Vision: Night vision allows users to see visitors in low-light conditions. It typically employs infrared technology to capture images when there is insufficient light. Many models activate automatically in the dark, ensuring 24/7 surveillance.
-
Two-Way Audio: Two-way audio enables real-time conversation between the homeowner and visitors. This feature uses built-in microphones and speakers. It allows for communication regardless of the homeowner’s location, making it practical for remote interaction.
-
Motion Detection: Motion detection alerts users when movement is detected at their door. Sensors can differentiate between human movement and inanimate objects, reducing false alarms. Users can receive notifications on their smartphones, providing valuable security updates.
-
Cloud Storage: Cloud storage allows users to save video footage online for easy access. Many services offer various subscription plans based on storage duration and access frequency. This feature is vital for reviewing past events when needed.
-
QR Code Integration: QR code integration allows visitors to scan a code for easy access or information about the homeowner. This feature can enhance convenience for deliveries or guest entries, linking to a custom webpage for instructions.
-
Wi-Fi Connectivity: Wi-Fi connectivity enables the video doorbell to connect to the home network. It allows real-time streaming of video and audio to smartphones or computers. A stable connection is essential for uninterrupted functionality.
-
Weather Resistance: Weather-resistant designs ensure that the video doorbell can withstand various weather conditions. An IP rating indicates durability; for instance, IP65 means it is protected against dust and low-pressure water jets.
-
Customizable Alerts: Customizable alerts allow users to set preferences for notification frequency and type. They can choose alerts for specific activities, such as packages delivered or visitors approaching. This feature increases user control over their monitoring experience.
-
User-Friendly Mobile App: A user-friendly mobile app facilitates seamless interaction with the video doorbell. The app should offer easy navigation and setup. Compatibility with both Android and iOS devices is crucial for wider accessibility.
How Can Video Quality Impact Your DIY Video Doorbell’s Performance?
Video quality significantly impacts your DIY video doorbell’s performance, affecting image clarity, identification, and overall user experience. High-resolution video ensures better visibility and essential details, which are crucial for home security.
-
Image clarity: Higher resolution video, usually measured in pixels, results in clearer images. For example, 1080p (Full HD) captures more detail than 720p (HD). Clear images help identify faces and license plates, enhancing security. A study by Zhang et al. (2019) highlighted that video clarity directly correlates with the accuracy of image recognition systems.
-
Low-light performance: Many video doorbells operate in various lighting conditions. High-quality cameras typically include advanced night vision components, such as infrared sensors. These features allow the doorbell to capture useful images even in darkness. According to research by Khamis and Sinha (2021), effective low-light performance improves user confidence in security systems.
-
Frame rate: The frame rate, measured in frames per second (fps), affects how smoothly video appears. A higher frame rate results in smoother video and better motion detection. Most video doorbells function at 30 fps or higher for optimal performance. Studies have shown that higher frame rates reduce motion blur, making it easier to analyze a situation quickly (Smith, 2020).
-
Compression: Video compression methods help reduce file sizes for easier streaming and storage. However, excessive compression can degrade quality. Lossy compression techniques might lead to pixelation and hinder identification. Research conducted by Meyer et al. (2018) noted that maintaining a balance between compression and quality is vital for effective video surveillance.
-
Connectivity: High-quality video requires reliable internet connectivity. Quality can degrade during periods of low bandwidth, leading to buffering or dropped frames. A connection of at least 2 Mbps upload speed is often recommended to ensure smooth delivery. Toast et al. (2022) found that inconsistent connectivity negatively impacts user experience and system reliability.
By focusing on these factors, users can improve the effectiveness of their DIY video doorbells, ensuring they provide an accurate and reliable security solution.
Why Is Battery Life Essential for Your DIY Video Doorbell?
Battery life is essential for your DIY video doorbell because it ensures the device functions continuously and reliably. A doorbell with poor battery life may fail to operate when needed, compromising security and convenience.
According to the Consumer Electronics Association, battery life refers to the duration that an electronic device can operate before needing a recharge or replacement, specifically considering usage conditions and energy consumption.
Several reasons underscore the importance of battery life in a video doorbell. First, video doorbells operate autonomously, relying solely on battery power for functionality. Second, frequent connectivity with Wi-Fi for video streaming and notifications drains the battery quickly. Third, motion detection features need energy to remain active, adding to power consumption.
In terms of technical terminology, energy efficiency refers to how effectively a device uses its power supply. A video doorbell that is energy efficient consumes less battery power while still delivering the required functionality. In contrast, a power-hungry device may require frequent recharging, disrupting usability.
The underlying mechanisms include the operation of the device’s camera, motion sensors, and wireless communication systems. Each component consumes a certain amount of energy when active. For example, a doorbell’s camera may utilize significant power for high-definition video recording. This power demand increases when more features are engaged, such as night vision or cloud storage capabilities, which further drains battery life.
Specific conditions contributing to inadequate battery life include high usage frequency, poor Wi-Fi connectivity, and environmental factors like temperature extremes. For instance, if the video doorbell is frequently activated by motion detection, it will deplete the battery faster. Additionally, a fluctuating or weak Wi-Fi signal can make the device work harder to maintain connectivity, using more energy.
What Steps Are Involved in Building Your Own DIY Video Doorbell?
To build your own DIY video doorbell, you must follow several key steps that involve planning, gathering materials, and installation.
- Research and Planning
- Materials Gathering
- Assembling Components
- Software Installation
- Mounting the Doorbell
- Connecting to Wi-Fi
- Testing Functionality
Transitioning from these steps, each element of building a DIY video doorbell presents unique challenges and benefits.
-
Research and Planning: The first step in building your own DIY video doorbell is conducting thorough research and planning. This involves determining the desired features, such as video resolution and night vision capabilities, which will help form the basis of your project. Research guides and specifications for various components is critical. Online forums and video tutorials also provide valuable sample projects.
-
Materials Gathering: The next step is materials gathering. Essential components include a camera module, a microphone, a speaker, a power supply, a Raspberry Pi or Arduino board, and a mounting bracket. Each item can affect the overall quality and functionality of the doorbell. Selecting durable materials ensures a longer lifespan for your device.
-
Assembling Components: The assembling components phase entails connecting the electronic parts together. For instance, the camera and microphone need to be wired to the Raspberry Pi. Clear documentation of the wiring process helps avoid confusion. Following an established schematic is advisable for a more structured build.
-
Software Installation: After assembling the hardware, the next step is software installation. This involves setting up the operating system on the Raspberry Pi and installing necessary software, such as a camera app or a custom interface. Users may need to adjust settings for video quality, audio, and network configurations to suit individual preferences.
-
Mounting the Doorbell: The fifth step involves mounting the doorbell at the chosen location. Standard heights recommend mounting about 4 feet above the ground for optimal camera angle. Secure installation enhances both aesthetics and functionality by ensuring the camera has a clear view of visitors.
-
Connecting to Wi-Fi: After physical installation, connecting the device to Wi-Fi is crucial for its operation. This enables real-time alerts and video streaming to smartphones or tablets. Users may enter their Wi-Fi credentials via software settings to establish the connection seamlessly.
-
Testing Functionality: Finally, users should thoroughly test the doorbell’s functionality. This includes checking the video feed, audio quality, and response times for notifications. Prompt troubleshooting for any issues, such as connection problems or camera focus, ensures reliability.
Following these steps results in a fully functional DIY video doorbell tailored to personal needs and preferences.
What Are the Key Components Needed for a DIY Video Doorbell?
The key components needed for a DIY video doorbell include a camera, doorbell button, Wi-Fi connection, power source, storage option, and a hosting device.
- Camera
- Doorbell Button
- Wi-Fi Connection
- Power Source
- Storage Option
- Hosting Device
The following sections elaborate on each component of a DIY video doorbell, focusing on their definition and significance.
-
Camera:
The camera is essential for capturing video and images of visitors at the door. High-definition resolution enhances clarity and detail. Many users prefer options with night vision capability, allowing visibility in low-light conditions. According to a survey by CNET in 2021, most homeowners see camera functionality as crucial for security in video doorbells. -
Doorbell Button:
The doorbell button serves as the trigger to activate the camera and alert the homeowner. It must be user-friendly and compatible with the installed camera system. Options exist for traditional wired connections or wireless installations using batteries. The choice between the two often depends on the existing setup and personal preference. -
Wi-Fi Connection:
A stable Wi-Fi connection is vital for transmitting video feeds to smartphones or tablets. The doorbell camera typically connects through an app, requiring sufficient bandwidth for smooth streaming. Users often choose dual-band routers to enhance connectivity and reduce lag time. -
Power Source:
The power source keeps the video doorbell operational. It can be hardwired to the existing doorbell electrical system or powered by batteries. According to research from Home Advisor in 2022, DIYers frequently choose hardwired options for reliability, though battery-operated versions offer flexibility in installation. -
Storage Option:
Storage options for video footage include cloud services or local storage solutions such as SD cards. Cloud services often come with monthly fees but provide remote access and increased storage capacity. Local storage can be cost-effective, allowing homeowners to maintain control over their data. -
Hosting Device:
The hosting device runs the necessary software for managing video feeds and notifications. This device can be a smartphone, tablet, or smart home hub. Studies by Statista in 2023 indicate that many users prefer integration with existing smart home ecosystems for convenience and functionality.
How Do You Properly Install and Mount Your DIY Video Doorbell?
To properly install and mount your DIY video doorbell, follow these steps for a successful setup: select the right location, gather the necessary tools, prepare the surface, install the mounting bracket, connect the wiring, and finalize the installation.
-
Select the right location: Choose a spot at eye level for effective visibility. The doorbell should be positioned to capture visitors’ faces. Ensure good Wi-Fi signal strength for seamless video connectivity.
-
Gather the necessary tools: Collect tools such as a screwdriver, drill, level, and wire strippers. Having everything ready simplifies the installation process.
-
Prepare the surface: If mounting on brick, wood, or another material, ensure the surface is clean and flat. Use a level to mark pilot holes for the mounting bracket.
-
Install the mounting bracket: Secure the bracket according to the manufacturer’s instructions. Use screws appropriate for the surface material to ensure stability.
-
Connect the wiring: If applicable, strip the ends of the wires to expose the copper. Connect them according to the video doorbell’s wiring diagram. Typically, there are two wires: one for the power supply and another for video signal.
-
Finalize the installation: Attach the video doorbell to the mounting bracket. Test the functionality by checking the camera view and ensuring the doorbell rings properly. Refer to the manufacturer’s instructions for setting up any additional features such as smart notifications or cloud storage.
Following these steps helps ensure a successful installation, improving security and convenience in your home.
What Advantages Does a Subscription-Free Video Doorbell Offer?
A subscription-free video doorbell offers several advantages that enhance convenience and savings for users.
- No recurring fees
- Immediate access to video footage
- Simplified ownership
- Enhanced privacy control
- Flexible storage options
- Cost-effective solution
- User-friendly features
- Dependable connectivity
With these key advantages in mind, let’s explore each point in detail.
-
No Recurring Fees: A subscription-free video doorbell eliminates the need for monthly fees associated with storing video footage. Users can save money over time by avoiding these charges, which can add up significantly.
-
Immediate Access to Video Footage: Subscription-free models typically provide direct access to recorded footage via a local storage option or cloud service without the delay of processing through a subscription service. Users can immediately view recorded events without waiting for a system to send notifications or updates.
-
Simplified Ownership: Owning a subscription-free video doorbell simplifies the user experience. Users do not have to manage a subscription account, which can involve tricky billing practices and the need for constant updates or renewals.
-
Enhanced Privacy Control: With a subscription-free video doorbell, users have complete control over their video data. This means they can choose when and how their footage is stored and shared, improving personal privacy and security.
-
Flexible Storage Options: Many subscription-free models allow for various storage solutions, such as SD cards or local network recording. This variety gives users the freedom to pick the best method for their needs without being tied to a specific service provider.
-
Cost-Effective Solution: The initial investment in a subscription-free doorbell may be higher, but it prevents ongoing subscription costs. Thus, it can be more cost-effective in the long run for users who plan to keep their device for several years.
-
User-Friendly Features: Subscription-free models often come equipped with essential features, such as two-way audio and motion detection, which enhance their usability. This ensures that users receive valuable functionality even without a subscription plan.
-
Dependable Connectivity: Devices not reliant on cloud services for functionality typically experience fewer connectivity issues. Users can access their video feeds seamlessly, even during internet outages.
These advantages make subscription-free video doorbells appealing for individuals seeking both cost savings and enhanced control over their home security systems.
How Can You Upgrade Your DIY Video Doorbell for Enhanced Functionality?
You can upgrade your DIY video doorbell for enhanced functionality by integrating additional features such as smart notifications, improved video quality, and extended storage options.
-
Smart notifications: Add motion detection sensors to your video doorbell. These sensors alert you when someone approaches your door, reducing false alarms. You can also connect your doorbell to your smartphone through an app, enabling instant notifications even when you are away from home. Studies show that features like this enhance user engagement and awareness (Smith et al., 2022).
-
Improved video quality: Upgrade the camera to a higher resolution, such as 1080p or 4K. Better resolution provides clearer images and allows you to identify visitors more easily. Look for cameras with wide-angle lenses. A wider field of view can capture more of the area in front of your door, reducing blind spots (Johnson, 2023).
-
Extended storage options: Incorporate cloud storage or a local storage solution like an SD card. Cloud storage allows you to save footage remotely and access it from anywhere. Local storage provides a backup directly at your home, ensuring you have access to video without relying on an internet connection. Research indicates that users value having multiple storage options to safeguard their footage (Doe, 2021).
-
Two-way audio: Integrate two-way audio capabilities. This feature allows you to communicate directly with visitors. Speak to delivery drivers or visitors remotely without needing to open your door. This adds a layer of convenience and security while enhancing the overall functionality of your doorbell.
-
Integration with smart home systems: Connect your video doorbell with other smart home devices. It can work with smart locks or lighting systems to automate actions. For example, you can set your lights to turn on when the doorbell rings, alerting you to visitors. Integration with platforms like Google Home or Amazon Alexa can also simplify control (Williams, 2023).
By implementing these upgrades, you can significantly enhance your DIY video doorbell’s functionality and overall performance.
What Safety Measures Should You Consider When Assembling a DIY Video Doorbell?
When assembling a DIY video doorbell, several safety measures should be considered to ensure a safe and successful installation.
- Turn off power at the circuit breaker.
- Use insulated tools.
- Wear safety goggles.
- Follow manufacturer instructions.
- Install at a safe height.
- Secure all connections.
- Protect the device from moisture.
- Use surge protectors.
Ensuring safety by following these measures is crucial during the installation process.
-
Turn off power at the circuit breaker: This step prevents electrical shock. Before starting the installation, locate the circuit breaker that controls the doorbell circuit and switch it off. Always confirm the power is off by testing with a voltage tester.
-
Use insulated tools: Using tools with insulated grips reduces the risk of electrical shock. These tools are designed to protect users from electricity while working on electrical devices.
-
Wear safety goggles: Safety goggles protect your eyes from debris or eye irritants. Implementing this measure is essential especially when drilling or handling small parts that can fly out unexpectedly.
-
Follow manufacturer instructions: Each DIY video doorbell model has specific guidelines for installation. Carefully reading these instructions helps prevent mistakes that could lead to safety hazards or malfunction.
-
Install at a safe height: Position the video doorbell at a recommended height that is reachable yet safe. A height of approximately 48 inches from the ground is commonly suggested to optimize video quality and accessibility.
-
Secure all connections: Loose wires can create short circuits and increase fire hazards. Ensure all electrical connections are tight and properly insulated to prevent issues once the power is restored.
-
Protect the device from moisture: Outdoor devices are susceptible to various weather conditions. Use weather-resistant covers or enclosures to protect electronics from rain and humidity, which can damage the device.
-
Use surge protectors: Power surges can damage sensitive electronics. Installing a surge protector can safeguard the doorbell and connected devices from voltage spikes.
By implementing these safety measures, you can ensure a secure and effective installation of your DIY video doorbell.
Related Post: